


Why Start With a To-Do App?
Learning to code can feel intimidating. The good news is that React Native makes it possible to build mobile apps for iOS and Android with a single codebase, and it’s still one of the most popular frameworks in 2025.
When learning something new, it’s best to start small. That’s why so many developers begin with a to-do list app. It’s simple but practical, and teaches you the fundamentals:
- How to structure a React Native project
- How to use components like
View,Text,TextInput, andButton - How to store and update data with
useState - How to display lists with
FlatList - How to make things interactive with
TouchableOpacity
By the end of this tutorial, you’ll have a working to-do app you can run on your phone in under an hour. Let’s get started.
Step 1: Setting Up the Project
First, you’ll need Node.js installed. Download it from nodejs.org. Installing Node also gives you npm, the package manager we’ll use.
For beginners, the easiest way to start is with Expo, which handles a lot of configuration for you. Open your terminal and run:
npx create-expo-app my-todo-app
cd my-todo-app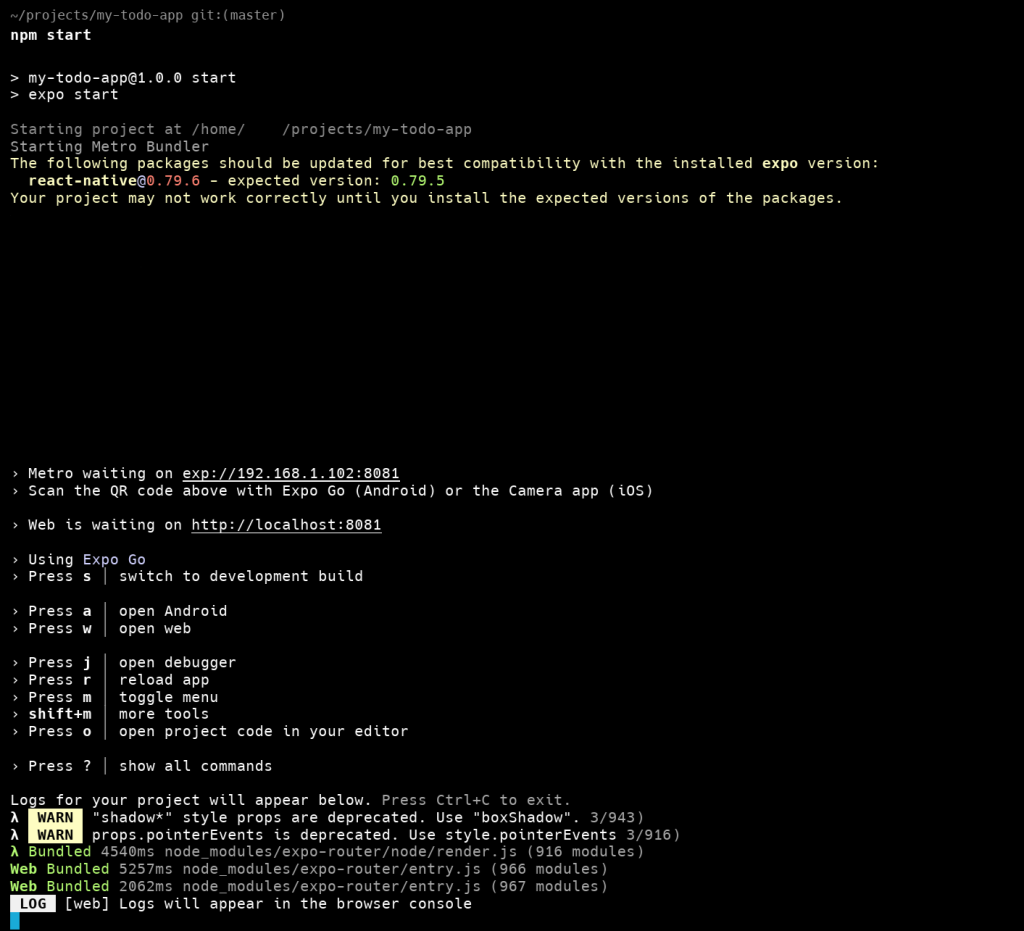
npm startExpo will create a folder called my-todo-app with all the boilerplate files. When you run npm start, you’ll see a QR code in the terminal. Install the Expo Go app on your phone, scan the QR code, and—just like that—you’ll see your new app running live on your device.
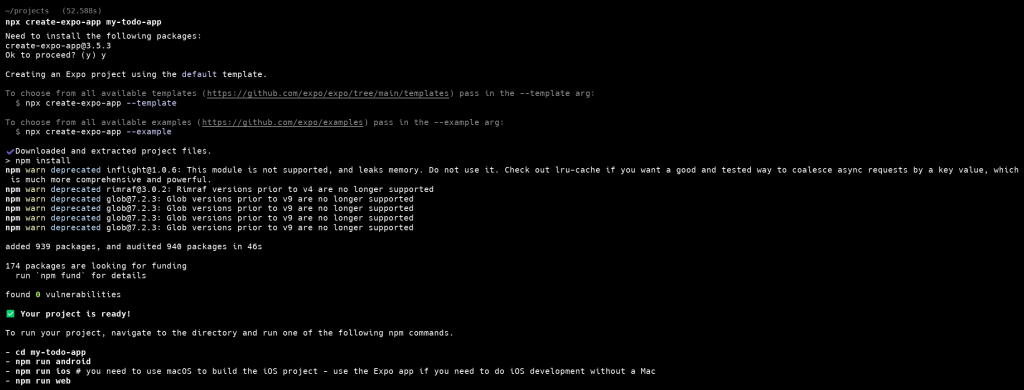
At this point it just shows a welcome screen, but that’s our blank canvas.
Step 2: Meet React Native’s Core Components
Before diving into code, let’s look at the building blocks we’ll use. React Native doesn’t use HTML elements like <div> or <p>. Instead, it provides components designed for mobile apps:
View→ The most common container, similar to adivon the web. It organizes layout and groups elements together.Text→ Used to display text on screen: titles, labels, messages.TextInput→ A text field where the user can type input, like new tasks for our app.Button→ A simple pressable button, often used for submitting actions.FlatList→ An efficient way to render long lists, like our list of todos.TouchableOpacity→ Makes any element pressable, and slightly fades (opacity) when tapped. Perfect for making todo items removable.StyleSheet→ Keeps your styling code organized. WithStyleSheet.create, you define all visual styles (colors, spacing, fonts) in one place.
Think of these as the LEGO bricks of your app. By combining them, you can build almost anything.
Step 3: Creating a Clean Starting Point
Open App.js in your editor and replace the contents with this minimal structure:
import React from 'react';
import { StyleSheet, Text, View } from 'react-native';

export default function App() {
  return (
    <View style={styles.container}>
      <Text style={styles.title}>My To-Do App</Text>
    </View>
  );
}

const styles = StyleSheet.create({
  container: {
    flex: 1,
    backgroundColor: '#fff',
    paddingTop: 60,
    paddingHorizontal: 20,
  },
  title: {
    fontSize: 24,
    fontWeight: 'bold',
    textAlign: 'center',
    marginBottom: 20,
  },
});This displays a white screen with the title “My To-Do App” at the top. It’s simple, but it confirms our project is running correctly. Now we can start building functionality.
Step 4: Adding State for Tasks
We’ll need two pieces of data:
- The list of todos.
- The text currently in the input field.
React provides the useState hook for this. Update your code:
import React, { useState } from 'react';
import { StyleSheet, Text, View } from 'react-native';

export default function App() {
  const [todos, setTodos] = useState([]);
  const [text, setText] = useState('');

  return (
    <View style={styles.container}>
      <Text style={styles.title}>My To-Do App</Text>
    </View>
  );
}todosis an array of tasks.textstores what the user is typing.
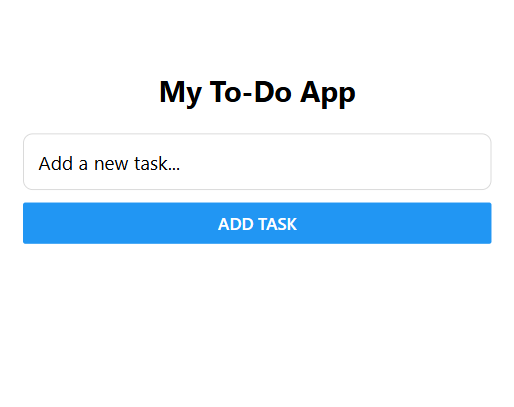
Step 5: Adding Input and a Button
Now let’s let the user type a task and add it to the list. We’ll use TextInput and Button.
<TextInput
  style={styles.input}
  placeholder="Add a new task..."
  value={text}
  onChangeText={setText}
  returnKeyType="done"
  onSubmitEditing={() => {
    if (text.trim().length > 0) {
      setTodos([...todos, { id: Date.now().toString(), text }]);
      setText('');
    }
  }}
/>

<Button
  title="Add Task"
  onPress={() => {
    if (text.trim().length > 0) {
      setTodos([...todos, { id: Date.now().toString(), text }]);
      setText('');
    }
  }}
/>Now when you type something and press the button, it gets added to todos. We still need to show it on screen.
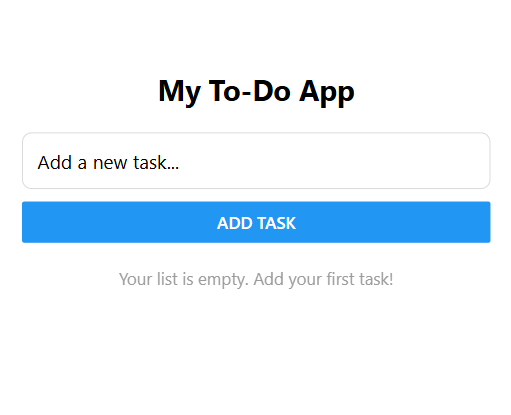
Step 6: Displaying the List with FlatList
React Native’s FlatList makes rendering lists simple and efficient. Add this below the button:
<FlatList
  data={todos}
  keyExtractor={(item) => item.id}
  renderItem={({ item }) => (
    <View style={styles.todoItem}>
      <Text style={styles.todoText}>{item.text}</Text>
    </View>
  )}
  ListEmptyComponent={
    <Text style={styles.emptyText}>Your list is empty. Add your first task!</Text>
  }
/>Now every todo you add appears on screen. If there are none, it shows a helpful message.
Step 7: Deleting Todos with TouchableOpacity
To make todos removable, wrap each one in a TouchableOpacity:
renderItem={({ item }) => (
  <TouchableOpacity onPress={() => setTodos(todos.filter(t => t.id !== item.id))}>
    <View style={styles.todoItem}>
      <Text style={styles.todoText}>{item.text}</Text>
      <Text style={styles.todoHint}>Tap to remove</Text>
    </View>
  </TouchableOpacity>
)}Now when you tap a task, it disappears. Simple, but effective!
Step 8: Styling the App
Finally, let’s polish the design with StyleSheet. Add these styles:
input: {
  borderWidth: 1,
  borderColor: '#d9d9d9',
  padding: 12,
  borderRadius: 8,
  marginBottom: 10,
  fontSize: 16,
},
todoItem: {
  padding: 14,
  borderRadius: 10,
  backgroundColor: '#f7f8fa',
  borderWidth: 1,
  borderColor: '#ececec',
  marginBottom: 8,
},
todoText: {
  fontSize: 16,
  color: '#222',
},
todoHint: {
  marginTop: 6,
  fontSize: 12,
  color: '#7a7a7a',
},
emptyText: {
  color: '#9b9b9b',
  fontSize: 14,
  textAlign: 'center',
  marginTop: 20,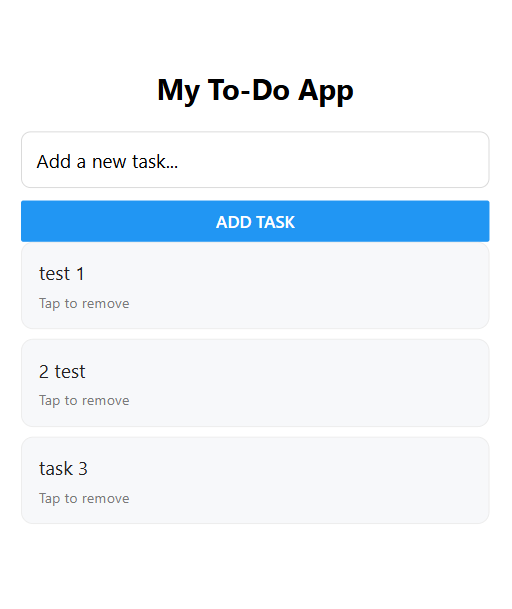
},The app now has a clean, minimal look.
Complete App.js
Here’s the entire code so you can copy and paste it directly into App.js and run it:
import React, { useState } from 'react';
import {
  StyleSheet,
  Text,
  View,
  TextInput,
  Button,
  FlatList,
  TouchableOpacity,
} from 'react-native';

export default function App() {
  const [todos, setTodos] = useState([]);
  const [text, setText] = useState('');

  const addTodo = () => {
    const trimmed = text.trim();
    if (!trimmed) return;
    setTodos((prev) => [...prev, { id: Date.now().toString(), text: trimmed }]);
    setText('');
  };

  const removeTodo = (id) => {
    setTodos((prev) => prev.filter((t) => t.id !== id));
  };

  const renderItem = ({ item }) => (
    <TouchableOpacity onPress={() => removeTodo(item.id)}>
      <View style={styles.todoItem}>
        <Text style={styles.todoText}>{item.text}</Text>
        <Text style={styles.todoHint}>Tap to remove</Text>
      </View>
    </TouchableOpacity>
  );

  return (
    <View style={styles.container}>
      <Text style={styles.title}>My To-Do App</Text>

      <TextInput
        style={styles.input}
        placeholder="Add a new task..."
        value={text}
        onChangeText={setText}
        returnKeyType="done"
        onSubmitEditing={addTodo}
      />

      <View style={styles.buttonWrap}>
        <Button title="Add Task" onPress={addTodo} />
      </View>

      <FlatList
        data={todos}
        keyExtractor={(item) => item.id}
        renderItem={renderItem}
        ListEmptyComponent={
          <Text style={styles.emptyText}>
            Your list is empty. Add your first task!
          </Text>
        }
      />
    </View>
  );
}

const styles = StyleSheet.create({
  container: {
    flex: 1,
    backgroundColor: '#fff',
    paddingTop: 60,
    paddingHorizontal: 20,
  },
  title: {
    fontSize: 24,
    fontWeight: 'bold',
    textAlign: 'center',
    marginBottom: 20,
  },
  input: {
    borderWidth: 1,
    borderColor: '#d9d9d9',
    padding: 12,
    borderRadius: 8,
    marginBottom: 10,
    fontSize: 16,
  },
  buttonWrap: {
    marginBottom: 12,
  },
  todoItem: {
    padding: 14,
    borderRadius: 10,
    backgroundColor: '#f7f8fa',
    borderWidth: 1,
    borderColor: '#ececec',
    marginBottom: 8,
  },
  todoText: {
    fontSize: 16,
    color: '#222',
  },
  todoHint: {
    marginTop: 6,
    fontSize: 12,
    color: '#7a7a7a',
  },
  emptyText: {
    color: '#9b9b9b',
    fontSize: 14,
    textAlign: 'center',
    marginTop: 20,
  },
});
Conclusion
Congratulations! 🎉 You just built your first mobile app with React Native. You now understand:
- How to use core components (
View,Text,TextInput,Button,FlatList,TouchableOpacity) - How to manage data with
useState - How to style an app with
StyleSheet - How to add and delete tasks in a simple list
This app may be small, but the same building blocks scale to much larger projects.
Of course, coding takes time. If your goal is simply to launch an app quickly for your business, you don’t always need to write code. Platforms like Goloris AI No-Code App Builder let you describe your app in plain language, and it generates the structure instantly. You can publish as a free Progressive Web App (PWA) or upgrade to launch on iOS and Android.
Whether you want to learn coding or prefer no-code speed, you now have both options.